

Want to learn how to use a PTZ controller for IP camera control? We’ve got you covered. In this guide, we’ll look at what a PTZ controller is, their key features, how to connect them and how to operate them.
What is a PTZ Controller?
A PTZ camera is exactly what it sounds like – a controller for your PTZ camera. Controllers are separate devices that give you more control over your camera’s pan-tilt-zoom functions.
You can also set presets and make other adjustments with the touch of a button. Some controllers have other functions that are specific to their models.
Key Features of PTZ Controllers
PTZ controllers have many features or functions that help make it easier to control your camera. While different models may have unique features, some of the most common ones allow you to:
- Adjust the camera’s exposure
- Set and adjust camera presets
- Adjust brightness and white balance
- Switch between cameras
- Adjust the pan, tilt and zoom speeds
- Control the zoom function
- Control the pan and tilt functions using a built-in joystick
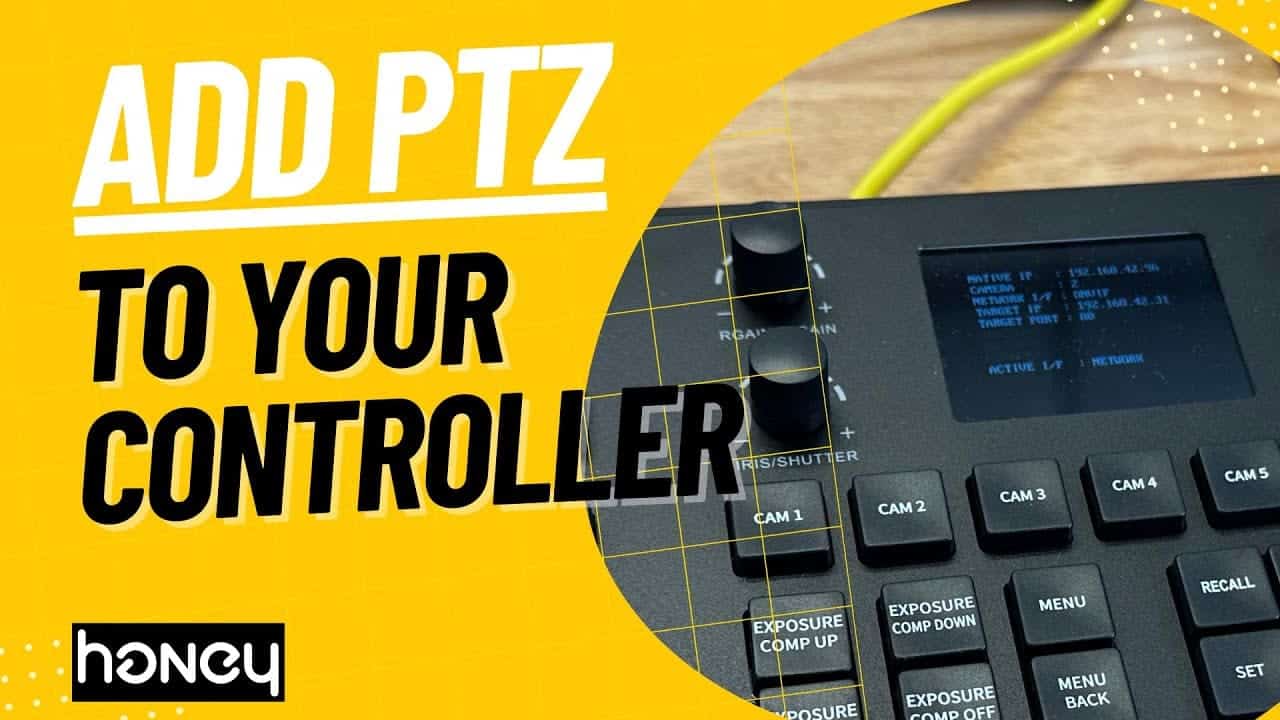
Many controllers also have built-in LCD screens that display the controller status.
Choosing the Right PTZ Controller
The right PTZ controller will make it easy to control your camera and produce the kind of video content you envision. The wrong controller can make it complicated or cause frustration.
There are many options out there. How do you choose the right one? Selecting a controller is a personal decision, but there are two important things to consider:
- Whether the controller is compatible with your camera
- Whether the controller has all of the features and functions you want
We may be a little biased, but we think our PTZ camera joystick is one of the best out there. Why? Because it offers precision control of your PTZ camera.
Here’s what the Honey Optics controller offers:
- Simultaneous serial and IP control
- Compatibility with a wide range of models in different PTZ IP camera price ranges, including HoneyOptics, BirdDog, PTZOptics, Sony, NewTek and more
- 7 quick presets and up to 255 camera presets
- Fine camera controls, including pan, zoom, shutter and iris speeds
- Switch between up to 7 cameras
Multiple connectivity options make it easy to start using our controller with virtually any setup.
Setting up and Configuring PTZ Controller for IP Camera
Setting up and configuring a PTZ controller for IP camera can be a complicated process if you’ve never done it before. The level of complexity ultimately depends on how many cameras you’re connecting to the network and the other components in your setup.
Let’s look at the process for a 4-camera setup that’s a little more complex.
- Camera 1 would connect to the controller and the switcher.
- Camera 2 would connect to camera 1, camera 3 to camera 2 and so on.
- All cameras would connect to the switcher.
- The soundboard would also connect to the switcher.
- The USB capture SDI would connect to your PC.
If you only have a single camera setup, then you may only need to connect your controller to your camera and your camera to your PC.
If you’re looking for more detailed information, we recommend checking out our guide on how to connect PTZ camera to the joystick.
If you’re using our controller, here’s how the configuration process works from the controller itself:
- First, press the Setup button.
- Use the joystick to navigate down to “Network Attributes.”
- To simplify the process, select DACP mode.
- Now, use the joystick to scroll back up to “Add Network Device” and click.
- From here, you can assign a number to your camera.
- Hit enter to choose a protocol.
- Next, enter the IP address of the camera, and hit Enter.
- Choose your port.
- Finally, add your username and password.
You can then hit the Home key and select your camera. You should be able to use the joystick to control the pan and tilt functions.
You can also go through this entire setup process through a web interface, which makes things a little bit quicker and easier.
If you’re more of a visual learner, check out our video on setting up the Honey Optics controller, which will walk you through all of the steps above.
Operating and Utilizing PTZ Controllers
Once you have everything connected, you can start using your controller. Once you’ve selected your camera, operating the controller is as simple as pressing the right button for your desired function.
- Use the joystick to pan and tilt
- Use the zoom switch to zoom in or out
- Adjust the exposure with the touch of a button
PTZ controllers typically have very intuitive control boards, which makes them easy to pick up and use even if you have no prior experience.
Conclusions
Using a PTZ controller for IP camera control will save you time and make it easier to get the shots you want for your stream or broadcast. Just make sure that you choose a controller that’s compatible with your camera and has all of the features you want.